When I taught Hebrew at an elementary school, one of my students’ favorite learning activities was playing matching games in my small groups. Aside from adding fun and competition to the language classroom, matching games are great for providing repetition of new vocabulary, and reviewing concepts, definitions, grammar, etc.
When I transitioned into virtual teaching, I needed a way to play matching games with my online language classes. There are tons of options for making and playing matching games online, but they’re designed for individuals, not groups. So I did what good teachers do, and I got creative, coming up with two ways to play, and I later discovered a third. What’s great is that none of the methods require your students to sign in or navigate anywhere outside of the meeting platform.
Here are all three options for playing matching games online with your online language classes:
OPTION ONE
This option works if your matching game is online AND you use Zoom as your meeting platform.
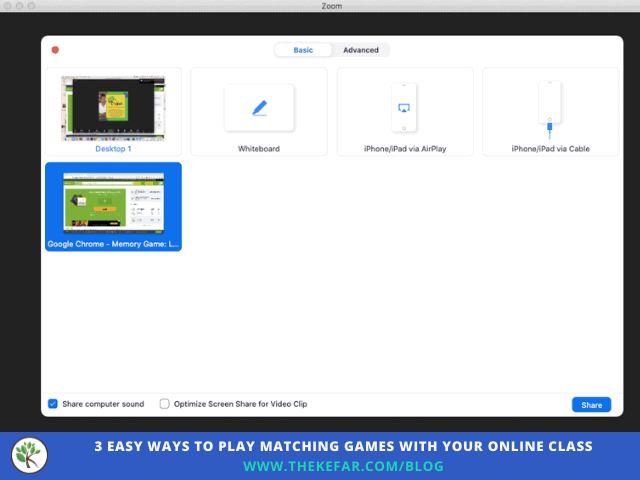
Pull up the matching game that you want to play, then share that window via Zoom. If the matching game has audio, be sure to check the “share computer sound” before sharing so students will hear clearly.
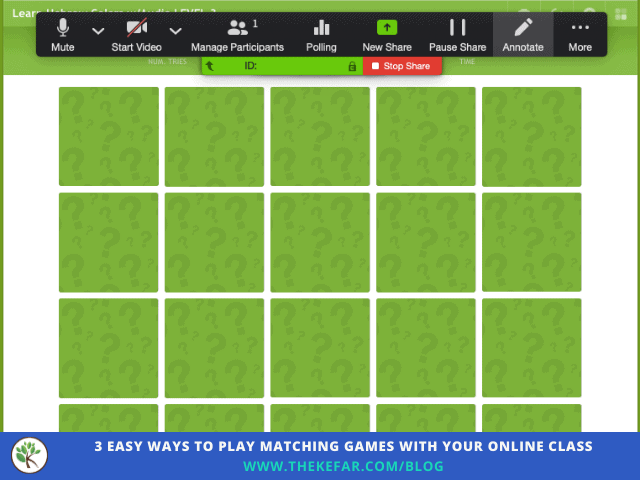
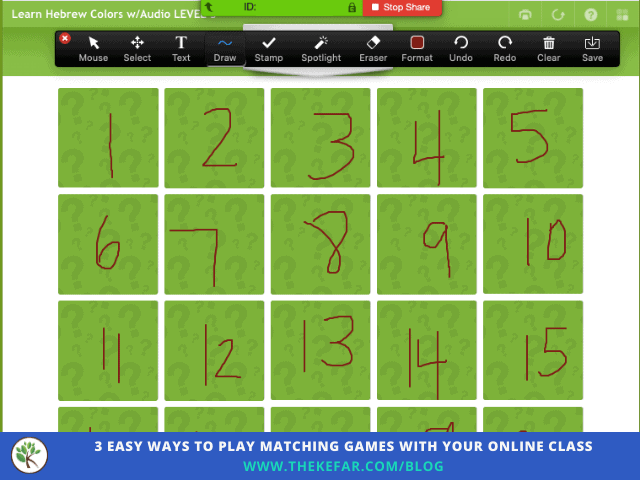
Once you’ve shared your screen, use the annotate tool to label each card; you can use numbers, letters, dots of different colors, shapes – whatever you want.
To play the matching game, each student simply calls out the cards s/he wants you to flip over – in the target language, of course – by using whatever labels you used. As matches are found, you can use the eraser tool to clear the labels.
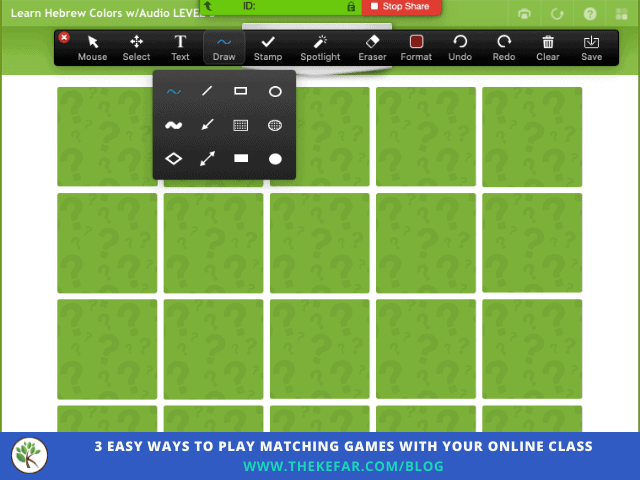
To play a matching game with your online class using this option, you have to be able to write on the screen, which is a feature unique to Zoom. If you use Microsoft Teams or Google Meet, check out options two or three.
OPTION TWO
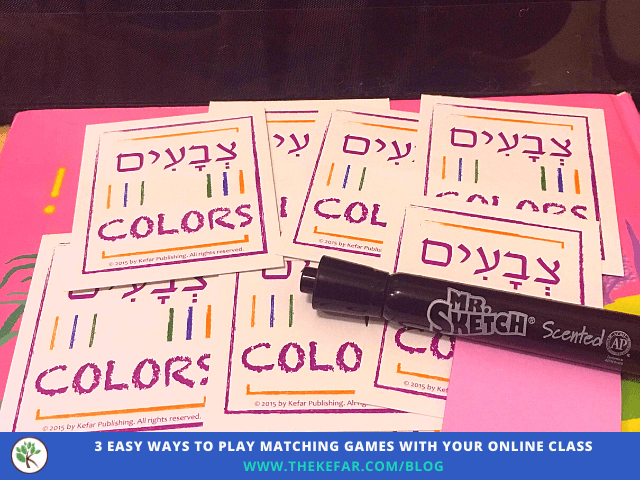
This option works if you have physical cards for your matching game.
If you already have a lot of printed card games and don’t feel like recreating or finding online versions, grab some sticky notes, a marker, and a pocket chart…because of course you have a pocket chart at home. If you don’t, are you even a teac….KIDDING! You can use one of those hanging jewelry or clear shoe holders instead.
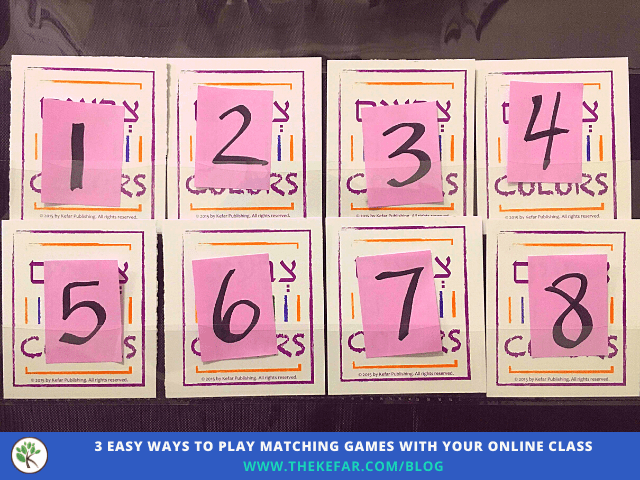
Shuffle your cards and spread them out face down. Put a sticky note on the back of each card, and label each one with a number/letter/color – whatever you want. Once you’ve labeled the cards, display them in the pocket chart.
To play the matching game with your online class, all you need to do is make the pocket chart visible to students on your screen. Since you labeled the cards, students can call out the specific ones they want you to turn over, again, using the target language. The example below is from a matching game I played in my Hebrew Circle Time class, so I only used a few pairs; I would use more pairs for older students or larger classes.
If you want to play a matching game with virtual cards, you can use either option one (if you have Zoom), or option three below.
OPTION THREE
This option works if your matching game is online, and you can use any meeting platform that allows you to share your screen.
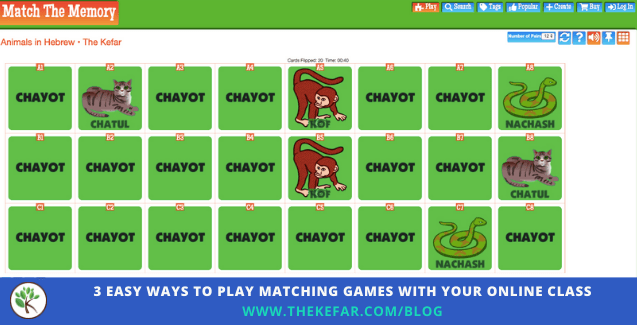
Match the Memory is a matching game website, and you can use the search bar to find existing matching games in the target language. I searched for both “Hebrew” and “Spanish” and there were a lot of games to choose from. It’s definitely worth taking a look at existing options before creating something new.

If you don’t find what you’re looking for, you can create your own matching game for free, and there are a lot of customization options.
On Match the Memory, the rows and columns are pre-labeled, so once you find or create a game, you don’t need to do anything else. Just pull up the game, share your screen with your online class, and students can identify the exact cards they want you to flip over.
Let me know which one of these options you’re going to try in order to play a matching game with your online language class. If you’ve found another way that works, share in the comments!
Until next time, keep teaching + thriving 💙
![]()

VIDEO: Easily Add YouTube Videos to Your LMS With This Time-Saving Tip
If you’re manually copying links to add your YouTube videos to Canvas or another LMS, you’re doing it wrong! When I started using Canvas LMS for my online Hebrew classes several months ago, I would upload my video recordings to YouTube, copy the link, open the class...

3 Ways to Teach Hebrew with Pictures
I love to teach Hebrew in Hebrew, even to beginners. It’s not as hard as you might think - and that’s not to say it’s easy - but with pictures and drawings, body language and facial expressions, real artifacts and other supports, students can learn Hebrew with minimal...

7 Hebrew phrases I never want to hear again: Notes from a year teaching in Israel
Have you ever thought about what you would do if a student yells out COCK in your classroom? No? Cool, me neither. It happened to me two years ago, but I remember it like it was yesterday. I was teaching my last class of the day, a rambunctious group of 4th grade...

7 Things I Learned Teaching Abroad in Israel
In the Summer of 2016, I got an opportunity to teach English abroad in Israel with an organization called TALMA: The Israel Program for Excellence in English. I taught incoming 4th graders at an elementary school in Jerusalem, and while there were some really amazing...

